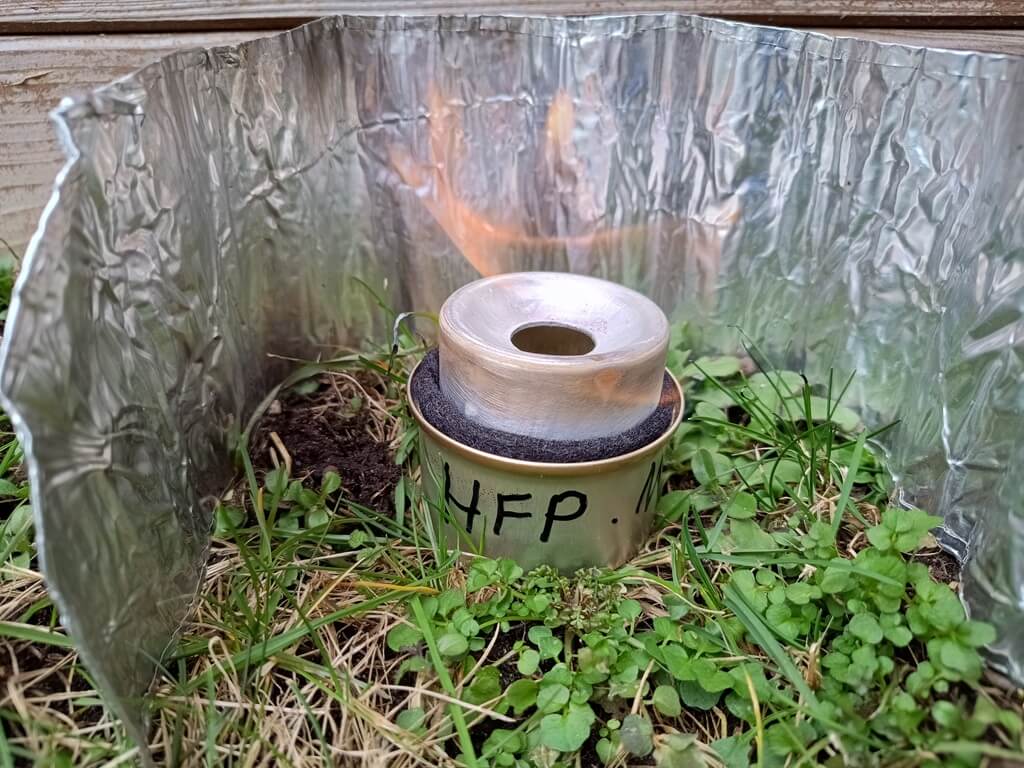
Fancy Feast stove | Mark 3
Since several years now I have been a massive fan off the Fancy Feast / Fancee Feast stove system, with its ease of use and construction its the best alcohol stove for most users. Here is my latest experiment for trying to improve on the original tomato paste can design.
I was looking to improve on the Fancy Feast tomato paste can design since it was prone to rust. And Aluminium is a bit easier to work with in my opinion. Here is my Mark 3 variant after a bunch of fidgeting with the same concept.
Previous versions and ideas
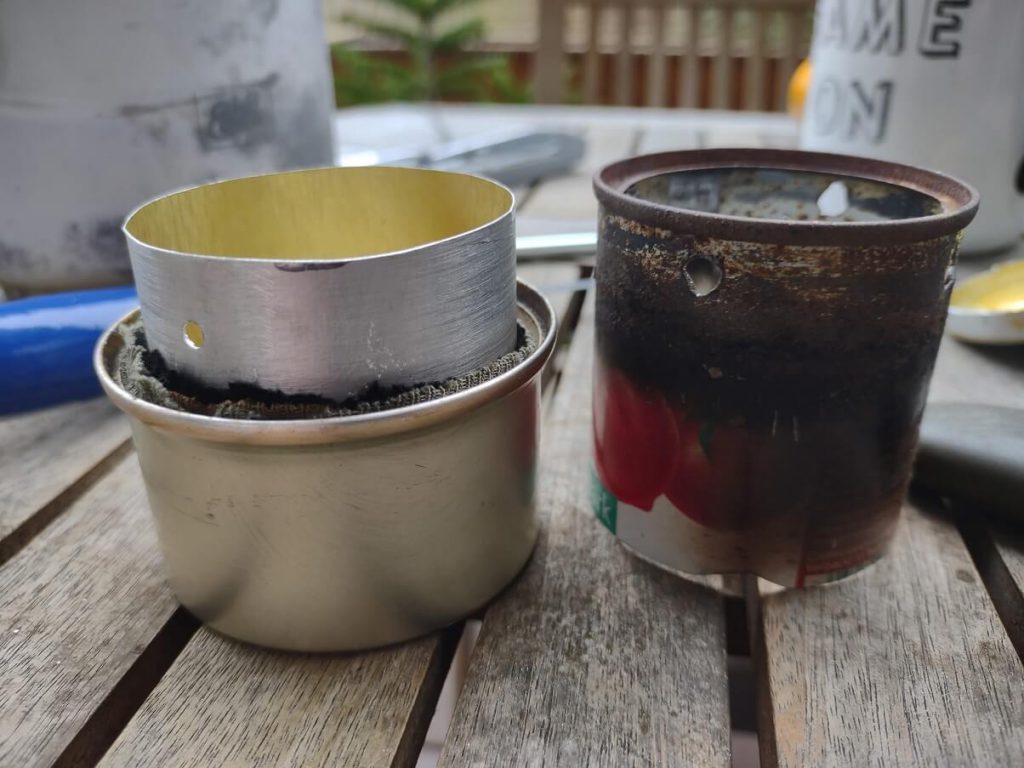
That first improved Fancy Feast design used another Aluminium can cut down in the middle, to use and shape the required inner part. It left however a thin edge up top that could get quite vulnerable. And a small push could bend the aluminum, which can be reshaped, but as you are aware weakens the metal in the long run.
I had the idea to roll the rim, however you need specialized tools for that, which I did not possess or have the place for in an apartment.
Since then I got to work with the tools I do have, and got the idea to use the existing rolled edge on the bottom of a can of got2b hairspray that my wife finished. The task however was to make a hole in the bottom to make sure the alcohol could be poured in. That required some labor, and held me back from trying that previously.
Mark 3 Design for the Fancy Feast Alcohol stove
The design for the Fancy Feast stove is simple, and for the most part the same as previous versions. It is however more work than others. Since we need to cut or file out as I did a port into the bottom of the material. If we don’t do this the pressure builds up to much, and filling the stove with fuel turns into a challenge.

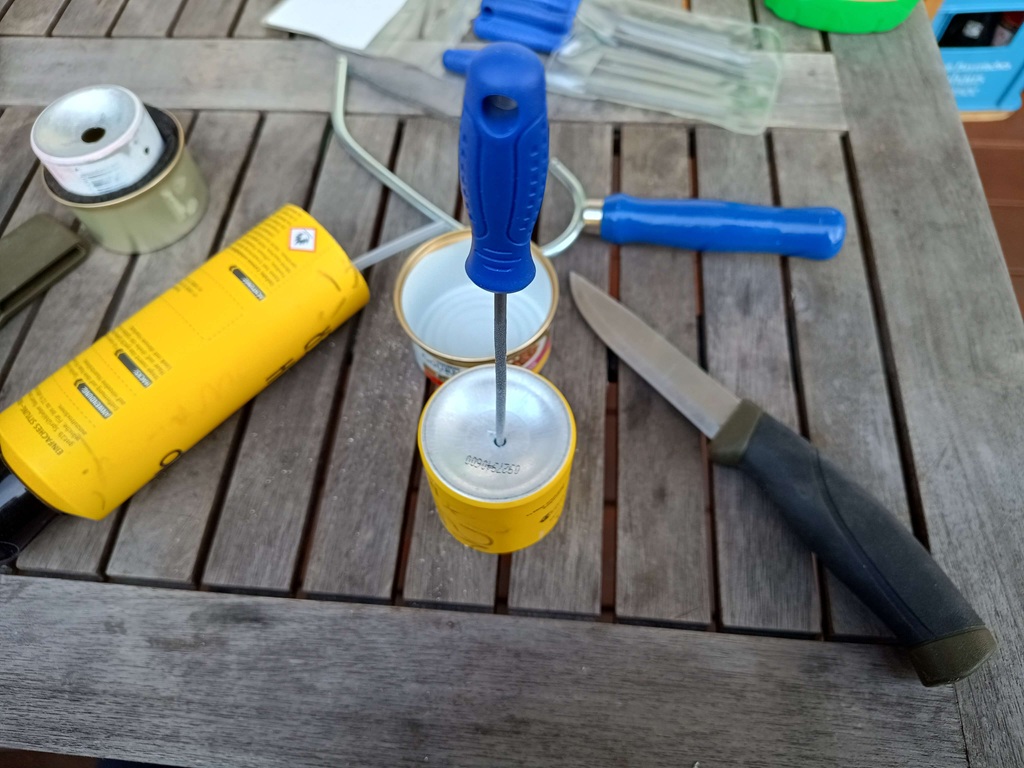
I thought of a few different ways to cut out the material needed, but landed on the in my mind safest way. And that was to start with a small hole made with my beater Mora Companion knife. And to expand it with files. Alternatives to this would be to drill it out with a hole cutter with a drill, or to use a Dremel tool. Please share any results that you explored if you replicate it. I’m sure it requires a lot less time than my way.
What you need for this version of the Fancy Feast:
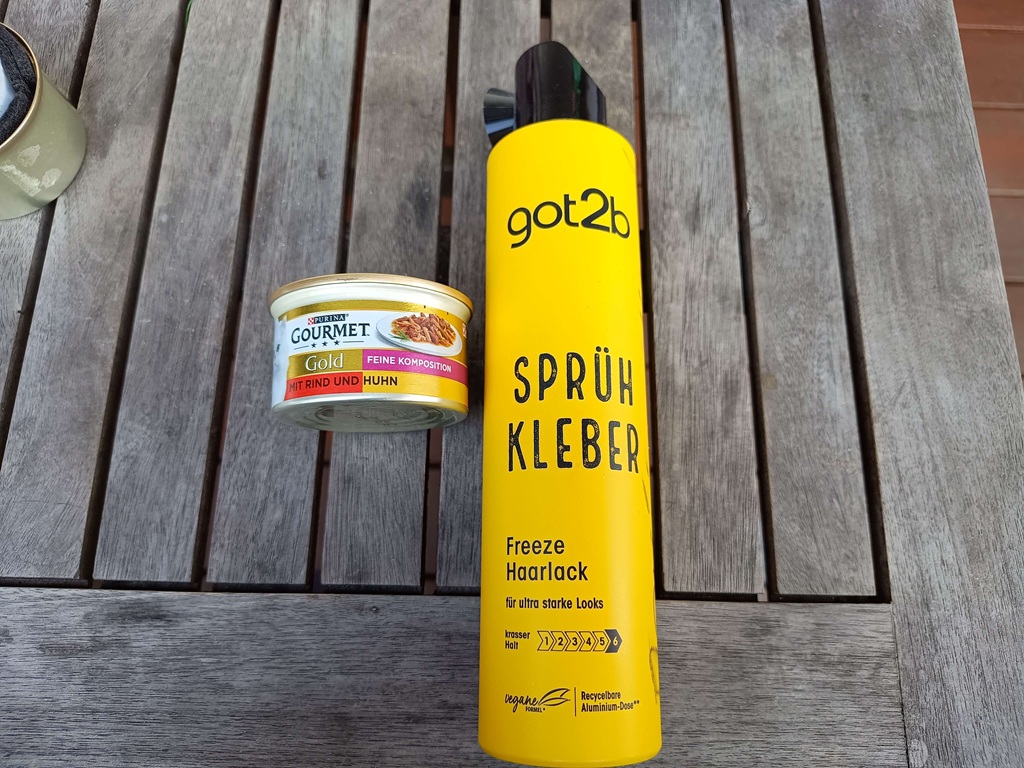
- Cat food can (fancy feast in US, gourmet in Europe)
- Hair spray can or similar (Exact one I used is a Got2B Sprühkleber) Rummaged from the recycle bin.
Filing out the hole pictured, sanding, and cutting took me around 2 hours all together. Which makes this design quite labor intensive. But hey, its what DIY-ing is all about right. If you have a Dremel tool or similar this can be cut down quite a bit.
Same basic idea as my last Fancy Feast articles, is to cut the can to your required length. For this model I went with a length off 5,5 centimeters, drilled 1 vent hole at the top part off the stove. And created a 2 cm wide round hole in the top (bottom of can) of the stove. At the base of the inner part, file 4 grooves in to help the flow of alcohol to the wicking material. In the cat food can, file down the little lip that remains after taking of the lid. And cut a strip off carbon felt or the wicking material off your choice.
Carbon felt wick
As you see I changed out the Cotton wick from an old shirt to a Carbon felt wick. I am still on the fence however if it is absolutely necessary for the stove. I actually found a Cotton wick easier to light, and the same material lasted all those uses without needing to be changed out. With further testing I will share my thoughts on it again.
The Carbon felt I ended up ordering via AliExpress, the 3 mm thick one, you can easily get a sheet send to you that will last quite a few stoves. Its easy to cut with scissors. And when it shrinks or you cut it a bit to short its not the end of the world. Just slip in a sliver as needed to fill up the empty space.
Weight compared to other versions
| Tomato Paste Fancy Feast stove (original) | 25 grams |
| Rituals shower gel Fancy Feast stove (improved) | 18 grams |
| Got2b hair spray can (Mark 3) | 24 grams |
So with this sturdier version made out off aluminium we are at a gram lighter than the weight of the original Tomato Paste can. But in return it does not rust, and is even sturdier then the tin of Tomato paste. Thanks to saving the construction of the base of the can as much as possible.
With the DIY windscreen made from a serving platter, the total weight comes to 43 grams. Which when compared to the popular gas canister stove, MSR Pocket Rocket 2, is still 30 grams lighter.
Boil times
As always, boil times with any stove are all subject to a lot of factors. Maybe even more so with homemade alcohol stoves. In my test in “ideal” conditions. Inside on the stovetop, it reached 6:58 to a boil off 400 ml of water. My standard test. Since that is usually what I need for my Trail Meals and a cup off tea. Using my standard Esbit cookset, and the new and improved Mark 3 of my Fancy Feast stove.
I encourage everyone interested in Alcohol stoves to give the Fancy (Fancee) Feast stove system a try, I think it is one of the most accessible DIY Alcohol stoves out there. With excellent and no fuss performance. No pot stand needed, nor priming. Its just a joy to use.
Let me know what your latest DIY Alcohol stoves are!
Happy hiking and Hike for Purpose.
Frank
I'm Frank, the main guy and owner of this website. Loves hiking, gear and bushcraft. And can get quite nerdy about them. In the woods several times a week preparing for my next hike. Always searching for another hill, which is quite difficult in the Netherlands. That's why I search around several countries. More about me on the about page.


One Comment
I. Fernandes de Oliveria
Can make a kind of “Fancy Feast” stove without the Carbom Felt wick – or any other wick maerial; instead use corrugated sheet of beverage can around the inernal can, the corrugations create capilarity, work well, someone posted a video of this variation in YouTube.
Since Carbon Felt is expensive and difficult to find in my “corner of whe world” I make one using an Coke can for the esternal part (fuel depot), and deodorante bottle for internal part (pot support) and steel wool (for cleaning cooking pots) as wick material, work well and surprisingly the steel wool create a “varnish” in the flame area and last longer. Probale the “varnish” came from some additve of the automotive Ethanol sold there.